-
Introduction
-
Download
-
MAC Apple
-
Update
-
Backup
-
Welcome
-
Licence
-
10% Off Yearly
-
POD Basics
-
Upload Spreadshirt
-
Upload Shirtee
-
Upload Redbubble
-
Upload Teepublic
-
Upload Displate
-
Upload MBA
-
Upload Zazzle
-
Upload Society6
-
Upload Printful
-
Templates
-
KDP Basics
-
Productor Import
-
Beta Update
-
Update Version
-
Multi Account Upload
-
Subscription Settings
Documentation
Here you can find all important information about Ninja Automation and a complete documentation of all functions.
System requirements
Ubuntu, Mint 64bit -> DSL min. 2Mbit
Windows 7,Windows 10 64bit -> DSL min. 2Mbit
All Mac OS Versions -> DSL min. 2Mbit
Download
MAC Apple cannot be opened
If you find the following window on your Mac while launching the application, you can open the application as follows:
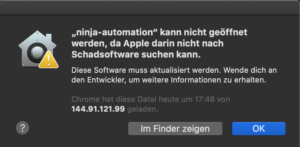
To start the application. Open Finder > Search Ninja > click right > Open
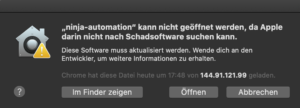
>click open -> it should work now…
Where is my data stored?
All data is stored locally on your computer. No listings, designs or personal data is stored on our server. Windows:
Windows:
C:\Users\<user>\AppData\Roaming\ninja-automation\
other data
C:\Users\<user>\AppData\Local\Programs\ninja-automation
Linux:
/home/<user>/.config/ninja-automation/
Mac OS:
/Users/<user>/Library/Application Support/ninja-automation/
How do I make a backup of my settings?
The following data can be saved or transferred to another computer. Import Settings, Global Settings, History, POD Settings.
Problems can occur with the history if the file path is not the same on the new computer or cannot be found.
Here the file can be adapted manually, or the same starting position (same user, same folder structure on the new computer) can be created.
Where are the files to be backed up?
(see, where is my data stored) In this path there is a /data directory. With the following files:
excelsettings.db -> ImportSettings
blueprintsettings.db -> BluePrint settings
globalsettings.db -> GlobalSettings
history.db -> History
podsettings.db -> POD Settings
uploadhistory.db -> Full Upload History Elements
uploadsettings.db -> Your Upload Limit Settings
On the new computer just install Ninja Automation. Close Ninja Automation. Overwrite the existing data directory with the saved data directory and start Ninja Automation.
Now the old settings should be available.
Update
If there are new updates you will be informed while starting the Ninja Automation (green dialog):
 To install the update click on the gearwheel on the top right -> Update Dialog
 Click on the blue button to start the download of the update. A progress bar will appear. As soon as it reaches 100%, you can click on the “Install and Restart” button and install the update. (The application will be restarted -> Please save all created listings in the history or Excel file, otherwise the listings will be lost)
Enter license key & OrderId
If the following message appears at startup: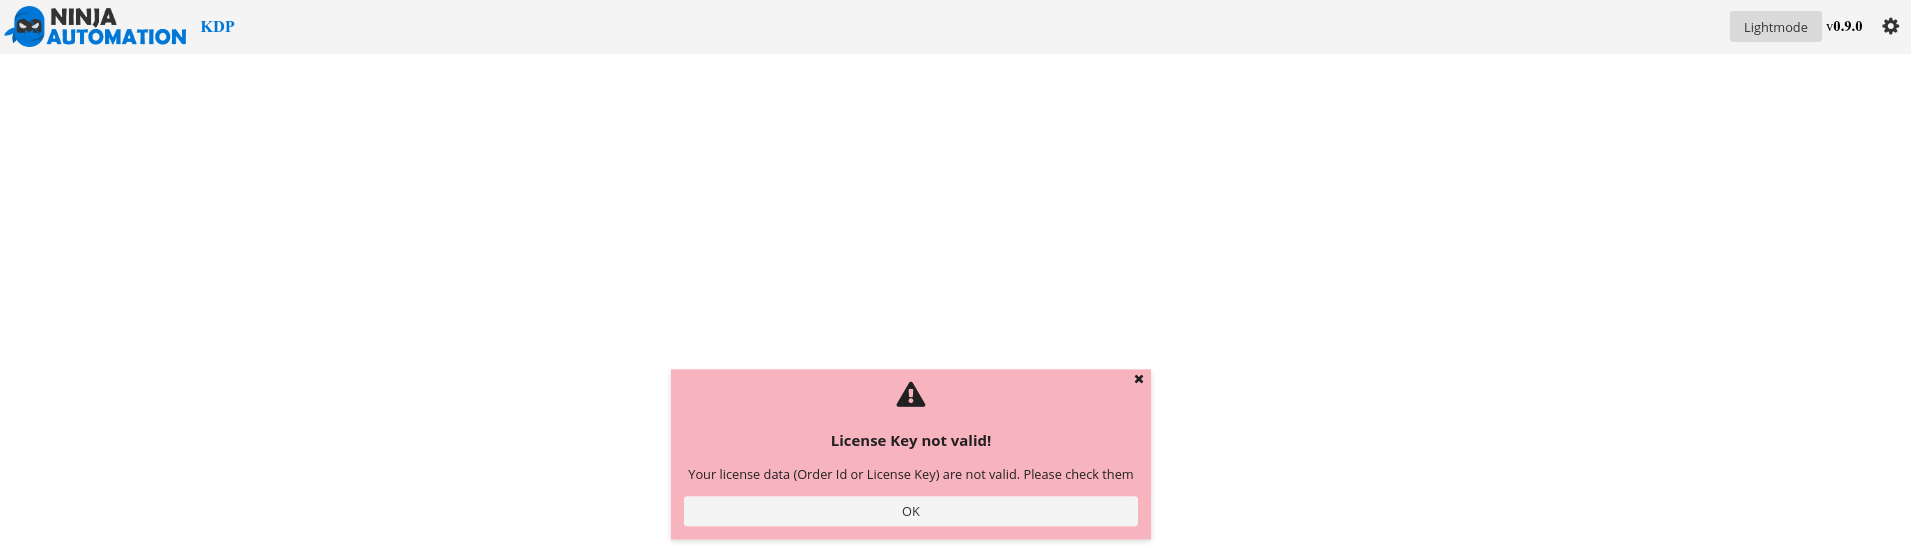 The license key and the Digistore Order Id must be entered. You will receive both after the purchase on the thank you page or by mail from Digistore.
- open Global Settings
 2. Enter Email and Key (Digistore Order ID)
Please enter Key (Digistore Order ID) in the red marked field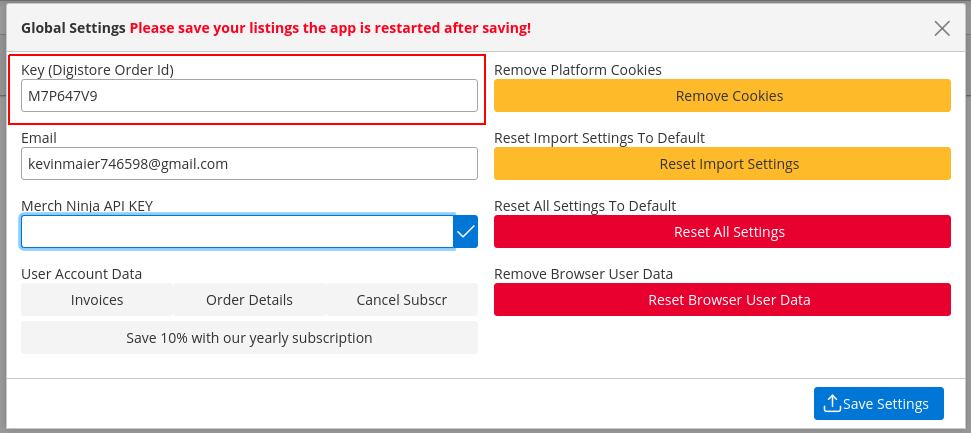
Change payment interval -10% off annual subscription
Change payment plan from monthly subscription to annual subscription and save 10%.
Global Settings > click Save 10 % > enter preferred payment method + data at Digistore.
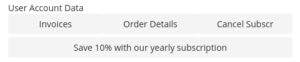
The subscription starts after your paid month or test period.
First Steps & Settings
Basic Functions
The following video explains the basic functions & features of Ninja Automation:
- Remove, Edit & Create Items via UI
- Template Based Uploading
- Upload Progress
- Upload Matrix
Advanced Features
In the following video you see several features of the Ninja Automation:
- Excel Import Export
- Drop Zone
- Append Function
- Image Converter
Creating Templates
Templates have to be created for Spreadshirt DE, Spreadshirt COM, Redbubble and Shirtee. This is used by Ninja Automation to upload listings and designs. Templates Best Practices
- The template name should be the same on all platforms and be unique
- eg: darkProductTemplate, whiteProductTemplate
- not: darkProductTemplate1 & darkProductTemplate2 if darkProductTemplate is existent…
- Write title in CamelCase without special characters or spaces
- Select products matching the design in the template
- eg: white design -> choose dark (black) products
- not: white Design -> whiteShirt
- If necessary, the scaling of the designs should be adjusted to the appropriate upload size in the template
-
- using the standard MBA format is recommended (4500px by 5400px 300dpi)
- adapt all scalings to this format
- If a different format is required for a platform, you can easily create your own template for the specific format
- When uploading to Spreadshirt you can choose if you want to use the file in MBA format or the format optimized by Spreadshirt (spreadshirtOptimzed=true) ==> uses Spreadshirt optimized format
.
- (spreadshirtOptimzed=false) ==> uses original file
-
Import Settings
The following spreadsheet describes all import settings, for more details see the video: uploadPlatform:
SPREADSHIRT_DE,SPREADSHIRT_COM,REDBUBBLE,SHIRTEE,TEEPUBLIC,DISPLATE,MBA,KDP
platforms for publishing the listing and design.
na_pod default config
| fieldname | default value | description (possible values) |
column |
|---|---|---|---|
| filepath | filepath | Path to your image | 0 |
| title | Title | Listing title | 1 |
| description | Description | Listing description | 2 |
| tags | Tags | Listings Tags (unused for MBA) | 3 |
| template | darkProductTemplate | Your blueprint name | 4 |
| shop | myninjashop | Shirtee Shop | 5 |
| category | Abitur & Abschluss | SHIRTEE category | 6 |
| marketplace | German | SHIRTEE Marketplace | 7 |
| lang | EN | Listing language (DE or EN) | 8 |
| spreadshirtMarketplace | Spreadshirt MP (ALLSHOPS, MARKETPLACE or yourshopname) | 9 | |
| uploadPlatform | SHIRTEE | Comma separated list of Platforms | 10 |
| teepublicTemplate | darkProductTemplate | Teepublic ninja default template (darkProductTemplate, whiteProductTemplate) | 11 |
| mainTag | gift | teepublic main tag | 12 |
| collection | myninjashop | displate collection (please create one) | 13 |
| displateCategory | Abstract,Floral | (for all values export as excel) | 14 |
| bullet1 | bullet1 | mba bullet 1 | 15 |
| bullet2 | bullet2 | mba bullet 2 | 16 |
| brand | brand | your mba brand name | 17 |
| colorTypes | black,dark_heather,asphalt,navy | mba color (for all values export as excel) | 18 |
| products | STANDARD_TSHIRT | mba products (for all values export as xlsx) | 19 |
| marketplaces | US | MBA Marketplaces (DE, US, GB) | 20 |
| fitTypes | men | MBA fit-types (men, woman, youth) | 21 |
| mbaPrice | price2 | (see the help link @ ninjaautomation) | 22 |
| redbubbleTemplate | 49574017-darkproducttemplate | redbubble template link | 23 |
| shirteeHex | #000000 | shirtee hex hex value for default color | 24 |
| printfulStock | USA | printful Stock (deprecated) No longer used | 25 |
| printfulStore | ninjastore | your printful store name | 26 |
| zazzleTemplate | https://www.zazzle.com/z/ahq6hq8b?rf=238933862491736682 | URL to your zazzle template | 27 |
| zazzleAudience | R | Zazzle Audience (R, G or PG-13) for more infos check zazzle page | 28 |
| zazzleRoyality | 6.5 | Zazzle Royality in % | 29 |
| redbubbleMatureContent | false | redbubble mature content (deprecated) No longer used -> Create a Template for Mature Content | 30 |
| shirteeDescriptionTxt | Deutsch | Use Shirtee default description (Check UI for all values) | 31 |
| teepublicAdultContent | true | Teepublic Adult Content (true/false) | 32 |
| printfulProfitChangeType | Increase | PF change profit (Increase/Decrease) | 33 |
| printfulProfitAmount | 25 | PF profit amount in % | 34 |
| printfulAmzMp | Amazon.com | PF amz marketplaces (Check UI For all values) | 35 |
| printfulMockup | PF Mockup Name. Please insert the exact name from the Printful Mockup page | 36 | |
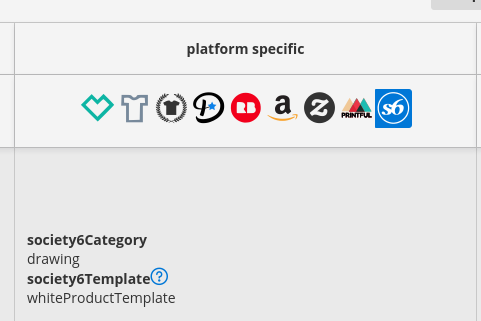
| society6Category | drawing | S6 Categorie please check ui for all Categories | 37 |
| society6Template | whiteProductTemplate | S6 Template Name | 38 |
| society6MatureContent | false | S6 Mature Content (true/false) | 39 |
| shirteeTemplate | darkProductTemplate | darkProductTemplate | 40 |
| spreadshirtTemplate | spreadshirtTemplate | spreadshirtTemplate | 41 |
| printfulTemplate | printfulTemplate | printfulTemplate | 42 |
| spreadshirtOptimzed | false | which image should be used (false => your image/ true => spreadshirt optimized image) | 43 |
| zazzleStore | ninjastore123 | Your Zazzle store name | 44 |
| zazzleStoreCategorie | ninjacat | Your Zazzle store categorie | 45 |
na_kdp default config
| fieldname | dvalue | column |
|---|---|---|
| cover | cover | 0 |
| manuscript | manu | 1 |
| language | English | 2 |
| title | Title | 3 |
| subtitle | Subtitle | 4 |
| author_firstname | Ninja | 5 |
| author_lastname | Automation | 6 |
| description | Description | 7 |
| tag0 | Keywords | 8 |
| tag1 | Keywords | 9 |
| tag2 | Keywords | 10 |
| tag3 | Keywords | 11 |
| tag4 | Keywords | 12 |
| tag5 | Keywords | 13 |
| tag6 | Keywords | 14 |
| category1 | Non-Classifiable | 15 |
| category2 | Fiction>General | 16 |
| largeprint | false | 17 |
| explicit | false | 18 |
| papertype | cream | 19 |
| width | 5.5 | 20 |
| height | 8.5 | 21 |
| bleed | false | 22 |
| finish | matte | 23 |
| primaryMarketplace | us | 24 |
| price | 8.4 | 25 |
| expandedDistribution | false | 26 |
SPREADSHIRT UPLOAD + Templates
In dem folgenden Video wird der Upload zu Spreadshirt DE & US gezeigt. Folgende Einstellungen müsst ihr vorher vornehmen:
- Settings > Plattform Settings > Login Daten Spreadshirt DE & US eintragen
- Min. 1 Template auf Spreadshirt DE oder Spreadshirt US anlegen (siehe Template Video)
- Im Backend von Spreadshirt unter Designs die Kachelansicht wählen.
Wenn Ihr einen Shop habt müsst ihr in der spreashirt Spalte eine Einstellung vornehmen: MARKETPLACE => veröffentlicht auf dem Marketplace ALLSHOPS => veröffentlicht in allen Shops MARKETPLACE, ALLSHOPS => veröffentlicht in allen shops und auf dem Marketplace MARKETPLACE, myninjashop => veröffentlicht auf dem Marketplace und in dem “myninjashop” (Alle Eingaben mit Komma trennen und die richtige Schreibweise verwenden)
REDBUBBLE UPLOAD + Templates
In the following video is shown the to Redbubble. You need to make the following settings beforehand:
-
- Settings > Platform Settings > Enter login data Rebubble
.
-
- Create min 1 template on Redbubble (see template video)
- Copy template url and enter it under POD Settings > Redbubble
.
Creating Redbubble Templates Redbubble login -> Manage your Portfolio  Upload a design (MBA format) and adjust all your settings. Scale for all products, select which products you want to sell etc. Enter the name of your template in the title field: save it as a private design and open it again afterwards. The URL in your browser should look like this:
 ![]() the middle part is your template URL which you can enter in the Ninja Automation under POD Settings: 48322697-whiteproducttemplate. If you create more than one template, you can use the comma separated list in the POD Settings > enter REDBUBBLE 48322697-whiteproducttemplate,48322555-darkproducttemplate…You can also watch the entire process here as a video:
the middle part is your template URL which you can enter in the Ninja Automation under POD Settings: 48322697-whiteproducttemplate. If you create more than one template, you can use the comma separated list in the POD Settings > enter REDBUBBLE 48322697-whiteproducttemplate,48322555-darkproducttemplate…You can also watch the entire process here as a video:
Create Redbubble Mature Content Template You can copy your previously created template and rename all fields to darkProductTemplateMc (Mc for Mature Content). To successfully publish the template as a Mature Content template, the following products must be deselected and the checkbox for Mature Content must be set. (Products as of 10/19/2020: Puzzle, Mask) 
 The template must then be stored in POD Settings > Redbubble > Templates as described above. If you now want to publish your products with the Mature Template simply select the Mature Content Template for your listing. If you have more than one template at Redbubble you have to repeat the process for all other templates. You can also watch the whole thing as a video here:
Creating SHIRTEE Templates
The following video shows the upload to Shirtee. You need to make the following settings beforehand:
-
- Settings > Platform Settings > Login data Shirtee enter
- Create min. 1 template on Shirtee US (see template video)
- Create Shirtee Shop
- Fill Shirtee column via the UI or via Excel.
Upload TEEPUBLIC
In the following section, the TEEPublic upload is explained. You must make the following settings beforehand:
-
- Settings > Platform Settings > Login data Teepublic enter
- Select MainTag and Template in the Teepublic column
What do the templates do?
Settings darkProductTemplate
Set primaryColor to Black for all Products
Set BaseBallTee Color to Black/White
Set AdditionalColor to “Select Dark Colors”
Set Hex Value for all other products to #00000
Scale Case, Pillow, Pin & Mask
Settings whiteProductTemplate
Set primaryColor to White for all Products
Set BaseBallTee Color to White/Black
Set Hoodie Color to Vintage Heather
Set AdditionalColor to “Select Light Colors”
Set Hex Value for all other products to #FFFFFF
Scale Case, Pillow, Pin & Mask
Advanced TEEPULIC Settings
Settings > POD Settings > Teepublic > Launch Mode is deprecated
Upload DISPLATE
The following video shows the upload to TEEPublic. You need to make the following settings beforehand:
-
- Upload template 1 design and create a collection
- Enter 7 tags (minimum number for Dsiplate)
- Title max 26 characters
- Select 1-3 categories in the template column
Upload MBA
The following video shows the upload to MBA.
-
- A Ninja Automation listing can be published on a Marketplace
- That means if you want to publish the same listing on UK & US, you need to create 2 listings (duplicate listing)
- Set prices (see video) MBA price listing
- Other than that, you should make sure not to use any product related texts in Title, brand, bullet1, bullet2, description
- If fit-types are not found they will be skipped
- If Color is not available for the product, it will be skipped
- The same for all other settings.
- If title, brand … are too long they will be cut to the maximum.
Upload to multiple marketplaces the same time: Open the Extended Input dialog and fill in all the languages you want to upload to:
Select the MBA marketplaces you want to upload to 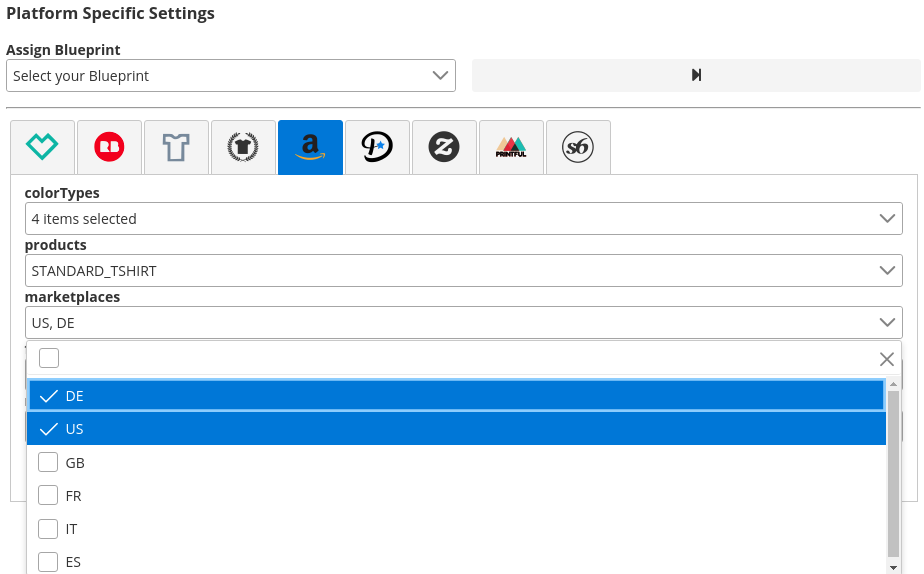
Upload to multiple marketplaces via na_extpod: Upload to multiple MBA marketplaces with a pre-filled Excel with different languages. The na_extpod Excel file is used for this purpose. This can be downloaded under Excel Import/Export > Download Extended Excel (The name of the Excel file must contain “na_extpod” otherwise the file is not read correctly!) The following fields are used as main language. This will be used to upload on all platforms.  If you want to upload for MBA on multiple marketplaces you can fill in the fields extLanguages.<LANGUAGE>.<FIELD>.
  Please remember to enter your marketplaces in the field “marketplaces” on which you want to publish your listing!This is how the whole thing should look after the import.
 ![]()
Upload Zazzle
When uploading to Zazzle, a store and store category can be specified. (if the fields: zazzleStore and zazzleStoreCategory are empty, then uploads to the pre-selected store).
Zazzle store specified and no store category uploads to default store category “New article”.
zazzleStore
Please enter the exact name (case sensitive)
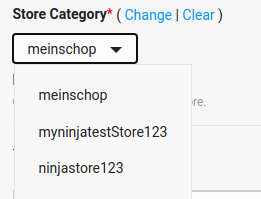
zazzleStoreCategory
If you want to publish a store category. Please create the store category before and specify the exact name (Case sensitive).
The following section explains how to upload to Zazzle. Create an account at Zazzle.com Under User > My Profile > Store > Open new Store create a store Under the store your listings will be published. You can find them like this: <Store name> click > Products The whole thing looks like this: 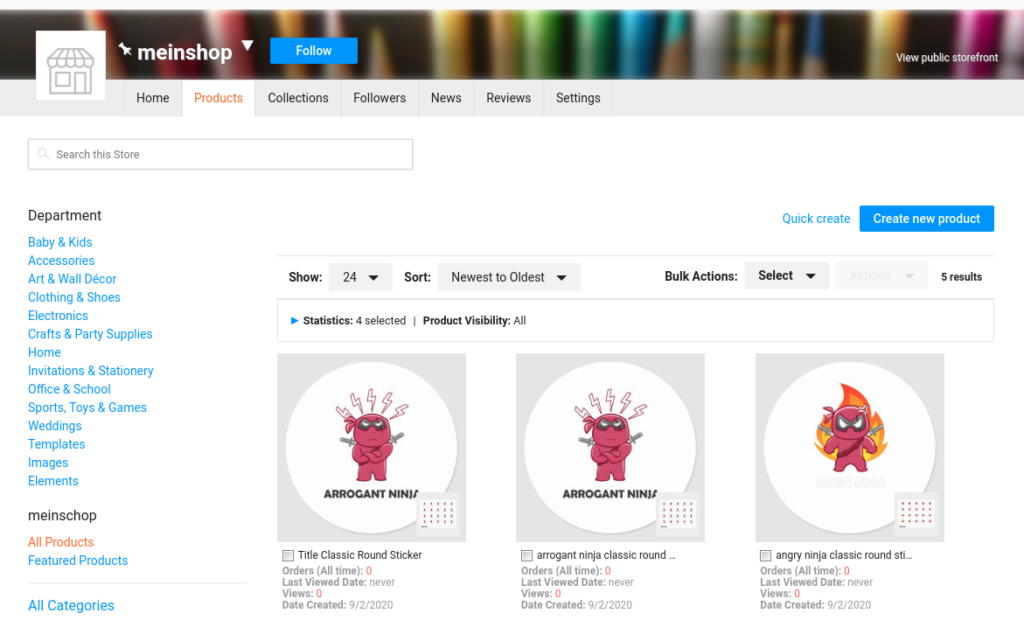 Now you have to create a Product Template for die Ninja Automation. To do this, click on “create new product” Select product type e.g.: T-Shirt > Men Basic Shirt The whole thing will look like this:
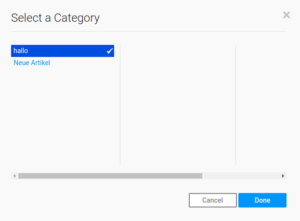
 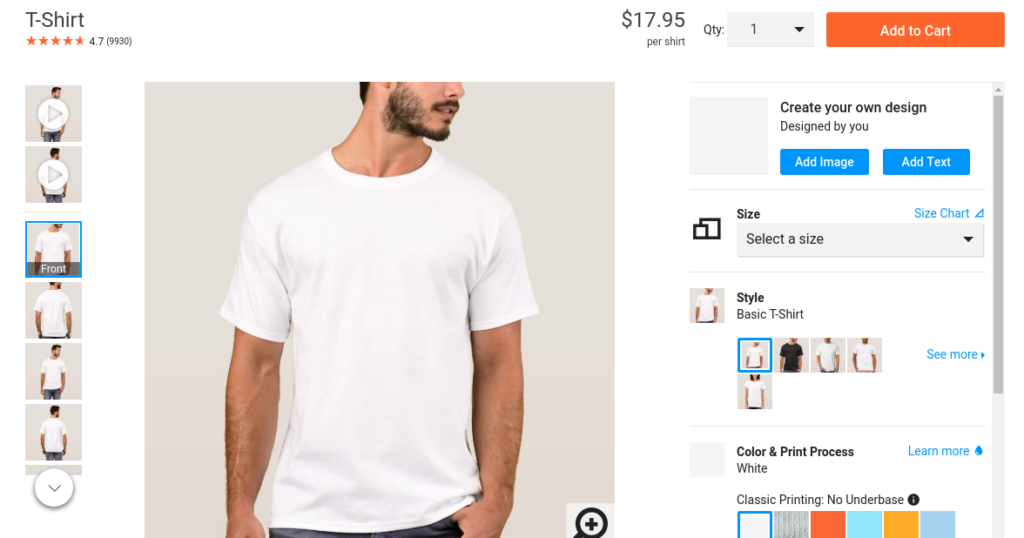 then click on “Add Image” Now upload an example design in MBA format and position it correctly (this is how all newly uploaded designs will be positioned) Confirm with “Done” and your template is ready. If you now click on the link button (next to the Twitter icon) you will get the link to your template….
  You can enter this in the Ninja Automation and give it a name.
  From then on it will be available for selection in the Zazzle tab
  You can now do the whole thing with all the products you want to publish on Zazzle.
The following section explains how to upload to Zazzle. Create an account at Zazzle.com Under User > My Profile > Store > Open new Store create a store Under the store your listings will be published. You can find them like this: <Store name> click > Products The whole thing looks like this: Now you have to create a Product Template for die Ninja Automation. To do this, click on “create new product” Select product type e.g.: T-Shirt > Men Basic Shirt The whole thing will look like this: then click on “Add Image” Now upload an example design in MBA format and position it correctly (this is how all newly uploaded designs will be positioned) Confirm with “Done” and your template is ready. If you now click on the link button (next to the Twitter icon) you will get the link to your template…. You can enter this in the Ninja Automation and give it a name. From then on it will be available for selection in the Zazzle tab You can now do the whole thing with all the products you want to publish on Zazzle.
Upload Printful
In the following section the upload to Printful is described.
In order for the upload to Printful to work, at least 2 stores must be created!
Your screen resolution must be at least 1024px*768px.
Create account at Printful.com.
With Printful you can serve multiple marketplaces. You can find an overview HERE (Click on marketplaces).
The following section describes how to upload to Printful. For the upload to Printful to work, at least 2 stores must be created! Create account at Printful.com. With Printful you can serve multiple marketplaces. You can find an overview HERE (Click on marketplaces) Once you have associated Printful with a new marketplace, you can find it in the dashboard under Stores: 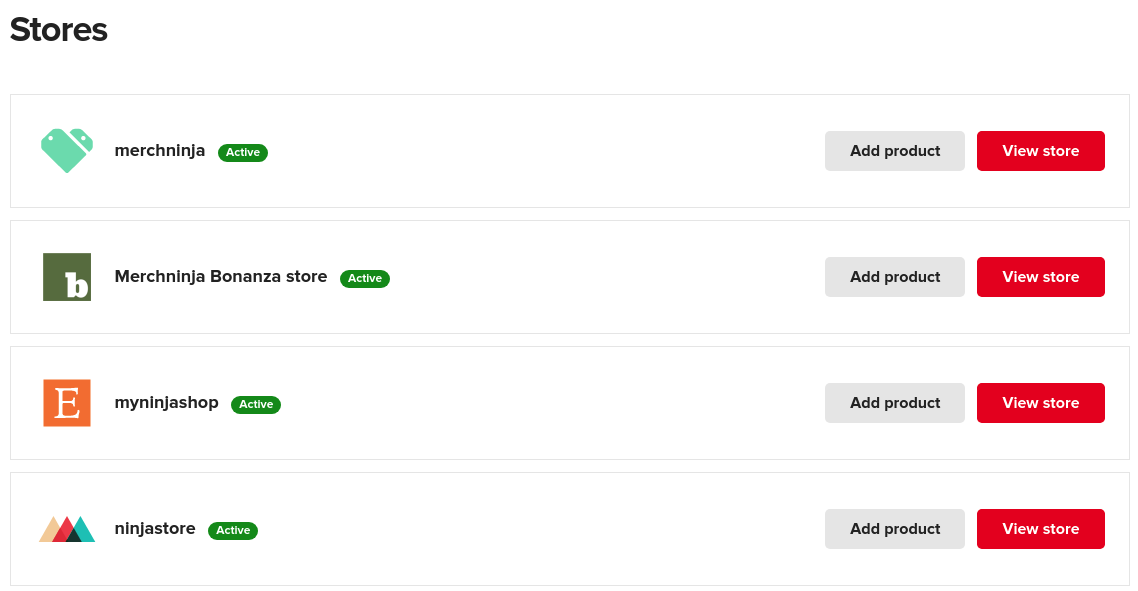
Create a Intentful Template
Importantly please do not use the default workflow to create a template, here price and Colors are missing when uploading via Ninja Automation. Please create the template as follows: Dashboard > Stores > Add Product (here it doesn’t matter which store you choose the template can be used for all stores) Select Product -> e.g.: “Unisex Premium T-Shirt | Bella + Canvas 3001” 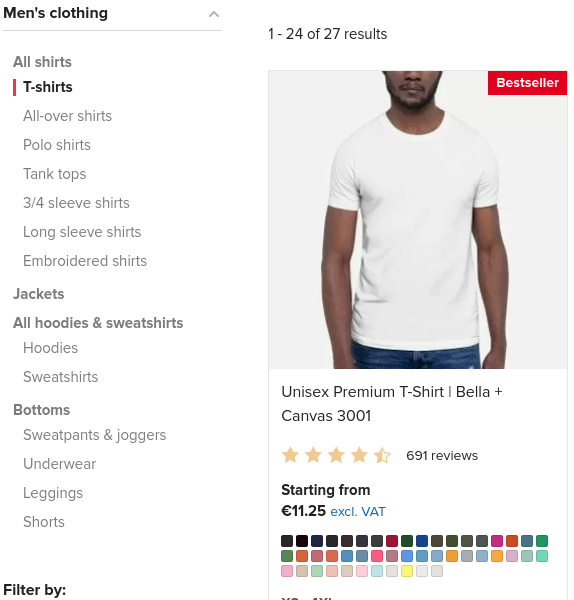 Select your desired values for the template (Stocked in, Color, Size):
 Now click on the “Details” tab. Here you define under Title the name of your template e.g.: whiteProductTemplate
 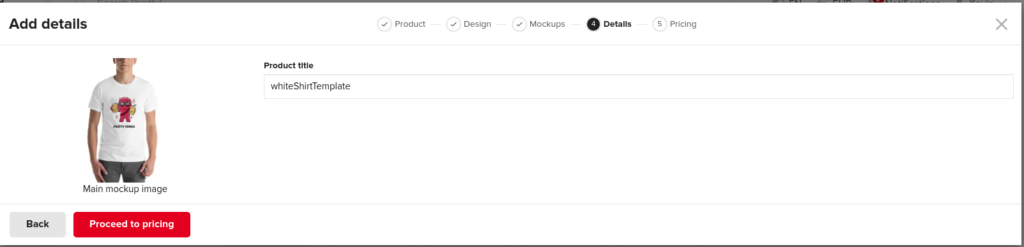 Now click through the other tabs to the Price Tab (Here you set your product price & margin):
 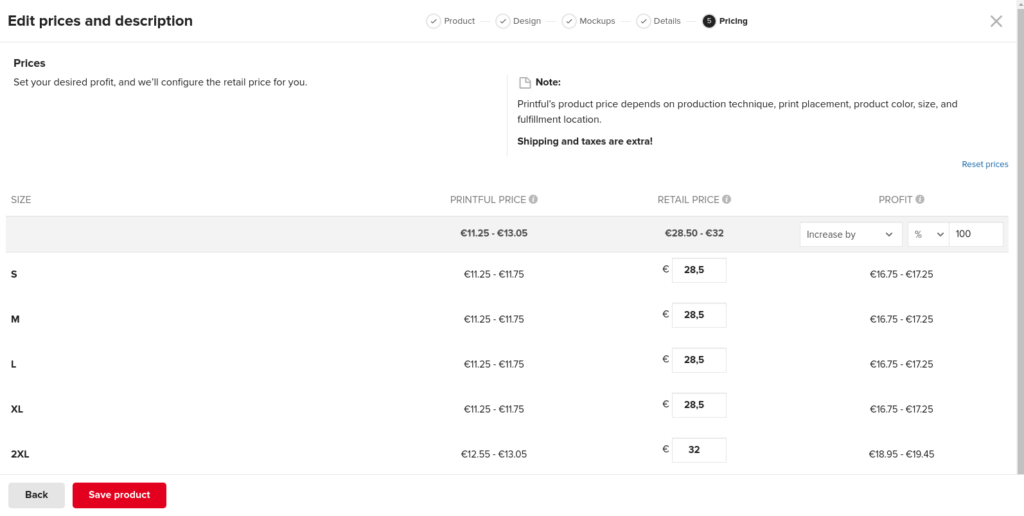 These are fixed in the template. If you want to fill the same product with another price or other sizes, you have to create a new template. Here click on “Save Product”. If the product was successfully created by Printful you can make a template out of it:
  After you have created the template it will appear in the dashboard under > Product Templates. The Ninja Automation must now be filled as follows:
 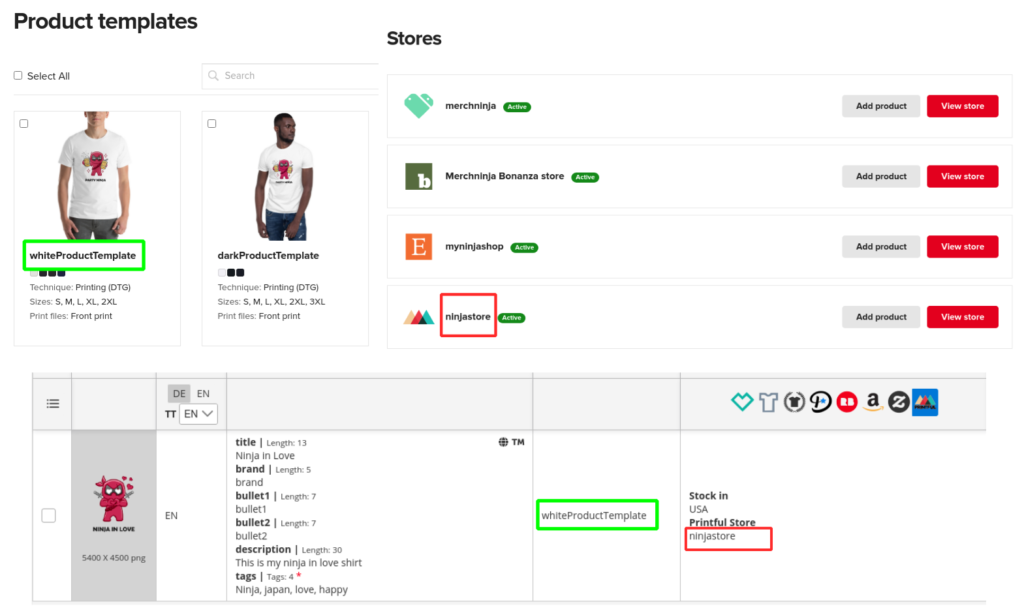 Depending on which store you upload to (Etsy, Stornify..) your listing must contain valid tags or description…. Mockup By default the “Flat Mockup” is chosen, if you want to use another mockup you have to enter the exact name in the input field for Printful Mockup in Ninja Automation. If the mockup name for the product cannot be found the default mockup will be selected…
.
Upload Society6
The following section explains the upload to Society6. You must make the following settings beforehand: You do NOT have to create your own template.
-
- Settings > Platform Settings > Enter login data Society6
.
-
- select Society6Category and Template in the Society6 column
.
 Fixes Society6 message If the following message appears on the Artist Studio Page after the first login. Please close it manually once via the (x) then the dialog should not appear anymore. If the upload does not continue -> restart upload again
 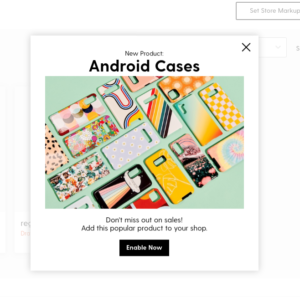 S6 supports only tags up to 20 characters! If a tag has more than 20 characters we will delete it automatically (message appears in log)
.
Society6 High Resolution Upload
To get your design on as many products as possible at s6 the following format is recommended: 13500x13500px 300dpi (HERE) If you use this format Ninja Automation will adjust the scaling for all formats. The positioning of your MBA design should look something like this:
Settings whiteProductTemplate
Set color if available: ‘Heather Grey’, ‘Unisex Zip Heather Grey’, ‘Unisex Pullover White’, ‘Unisex Zip White’, ‘Unisex Zip White Black’, ‘White’, for Products t-shirt, vneck-tshirt, long-sleeve-tshirt, hoody, tank-top
Scale Products
All products customized for MBA format
Settings darkProductTemplate
Set color if available: ‘Black’, ‘Grass’, ‘Navy’, ‘Tri-Grey’, ‘Asphalt’, ‘Unisex Sweater Black’, ‘Unisex Zip Black’, ‘Unisex Zip Tri Black’, ‘Tri-Black’ for Products t-shirt, vneck-tshirt, long-sleeve-tshirt, hoody, tank-top
Scale Products All products adapted for MBA format
Image Converter Society 6
For an optimal result with the darkProductTemplate you should convert your images with Image Converter for society6. You won’t see any visual change in the image, but the MetaTag will be set for a black background. More details here: https://www.youtube.com/watch?v=2PPwLad8whg 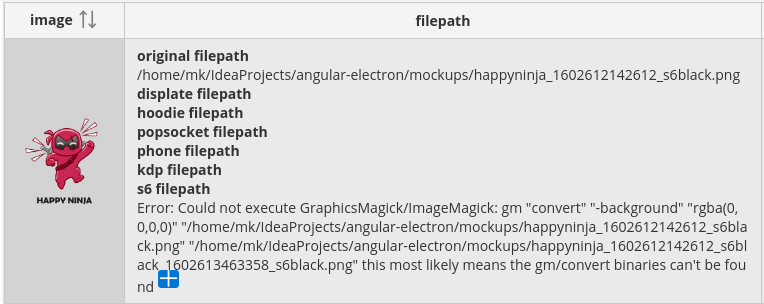
To set the society6 metatag using ImgConverter, GraphicsMagick must be installed on your PC otherwise you will get the following error message:
Error: Could not execute GraphicsMagick/ImageMagick: gm
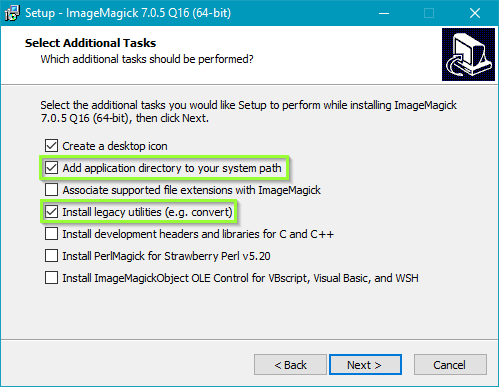
Install GraphicsMagick
 :
:
Windows/ Mac Os http://www.graphicsmagick. org/README.html
Linux sudo apt-get install -y graphicsmagick
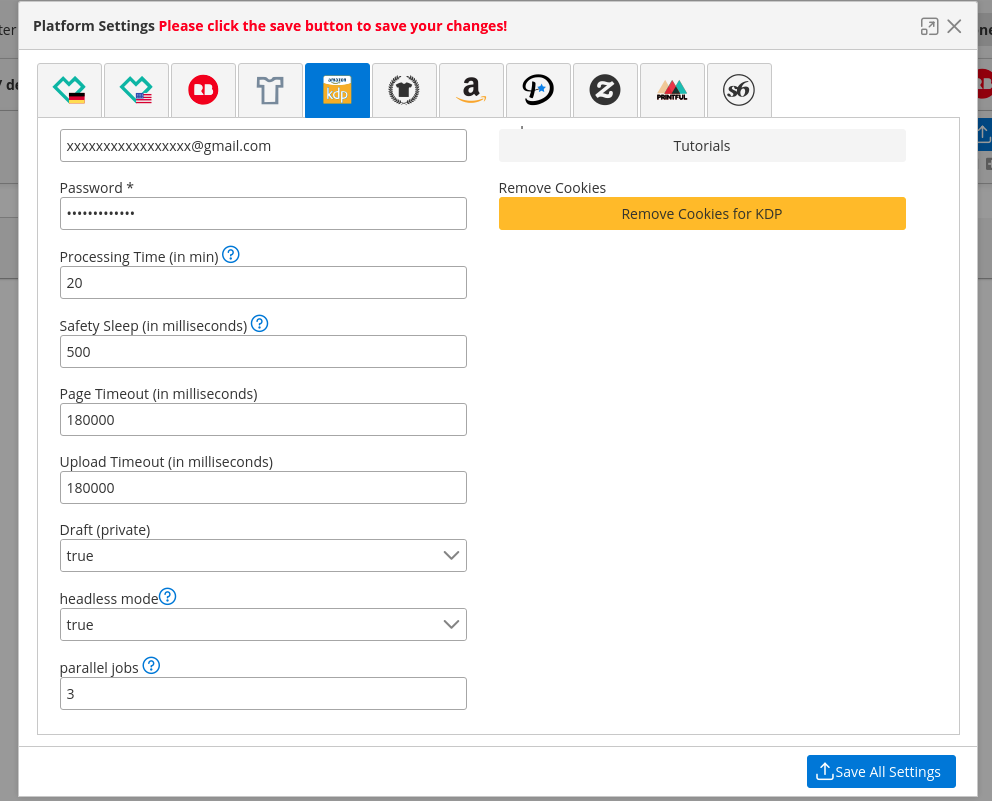
KDP Basics
KDP Multi Upload
the KDP Multi upload only works in headless mode.
Please set headless to true.
And then set the settings for Processing Time, Page Timeout, Upload Timeout to the following settings.
parallel jobs should be between 3-10 depending on computer and internet line and upload time.
If there are problems with the multi upload or headless mode change to (headless mode = false)
Productor Import
In the following video, you will export your MBA designs using the Productor for Merch By Amazon tool and import them into Ninja Automation:
Translation + TM Check
The following video shows the TM check and translation:
- On the basis of the Input Lang (column “lang”) the TM Check or the Translation is executed.
- lang -> ‘DE’ checks DPMA
- lang -> ‘EN’ check USPTO
Multi Account Setup
Wenn ihr auf einer Plattform mehrere Accounts habt, könnt ihr auf beiden Account’s uploaden, indem ihr 2 Ninja Automation Instanzen startet. Damit nicht bei beiden Instanzen die gleiche Konfiguration verwendet wird, müsst ihr auf eurem Betriebssystem einen User anlegen und eine Instanz mit dem neuen User starten. Wie das funktioniert wird hier gezeigt: Windows: (Zeitaufwand 10min) Windows User anlegen und Passwort vergeben. Mit neuem User anmelden + Ninja Automation installieren. Zum alten Benutzer wechseln und im File Explorer folgenden Pfad öffnen: C:\Users\<NEUER_USER_NAME>\AppData\Local\Programs\ninja-automation Rechts klick auf die ninja-automation.exe > Senden an > Desktop Auf eurem Desktop sollte jetzt eine 2. Verknüpfung der ninja automation existieren mit verweis auf das Verzeichnis des 2 Benutzers. Um die 2 Instance der Ninja Automation zu starten: SHIFT + RECHTS KLICK auf die neue Verknüpfung > Als anderer Benutzer starte > username + passwort des neuen Benutzer angeben > neue Instance sollte starten. Linux (Ubuntu) (Zeitaufwand 1min) In dem Beispiel erstelle ich einen neuen Benutzer mit dem Namen “ninja”. Der Name kann nach Belieben angepasst werden. Terminal öffnen (SHIFT+T)
sudo adduser ninja

##User erstellen und Passwort setzen

xhost local:ninja

##Hier Pfad von eurem Ninja Automation AppImage angeben

sudo chmod 777 /home/<YOURUSERNAME>/Downloads/ninja-automation-1.2.1.AppImage
sudo -H -u ninja /home/<YOURUSERNAME>/Downloads/ninja-automation-1.2.1.AppImage
MacOS (Zeitaufwand 1min) In dem Beispiel erstelle ich einen neuen Benutzer mit dem Namen “ninja”. Der Name kann nach Belieben angepasst werden. MacOs Admin User erstellen Terminal öffnen su ninja -c /Applications/ninja-automation.app/Contents/MacOS/ninja-automation
Subscription Settings
Show invoices
Ninja Automation > Global Settings > Invoices 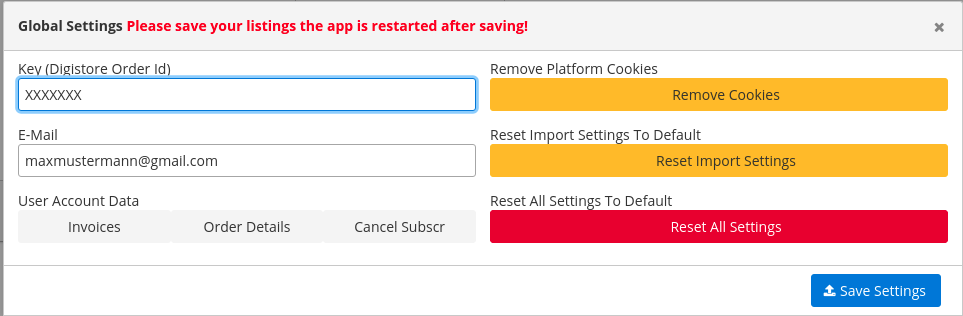
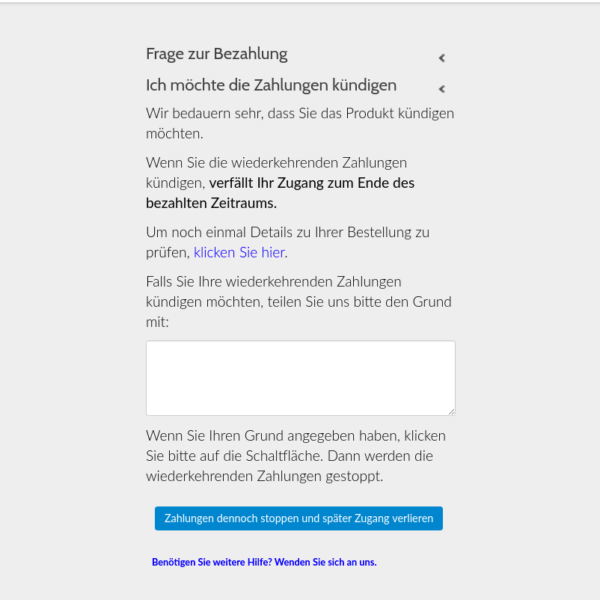
Cancel subscription
Ninja Automation > Global Settings > CancelSubscr Dann wird man auf Digistore24 weitergeleitet, hier einfach Grund angeben und bestätigen.